
This week, I’m teaching a Hack Your WordPress Theme workshop for Emory’s Digital Scholarship Commons. It’s fun (and not all that hard) to customize WordPress themes. The only problem is, in order to really access the theme files, you need to install WordPress on a server. But what if you’re not quite ready for that?
You can still play around with WordPress by getting your own computer to act like a server. Your WordPress site won’t be public, but you can make changes to your theme and, when you’re ready, upload it to a real server.
XAMPP is a software package that emulates a server on your own computer. Don’t worry, it’s not hard to install — there are just a couple tricky steps.
Navigate to the XAMPP website

Head to http://www.apachefriends.org/en/xampp.html. Click on the version of XAMPP that’s appropriate for the kind of computer you have. Since I have a Mac, I’m choosing XAMPP for Mac OSX.
Click on the link for the latest version of XAMPP

You might have to scroll down the page a bit to find it. You want the first link that appears underneath the purple bar. Once you click the link, XAMPP will be downloaded to your computer. If you get a message saying, “This type of file may harm your computer,” don’t worry! XAMPP is safe. Just click Keep or OK. It takes a few minutes to download, so go get a snack!
Install XAMPP on your computer
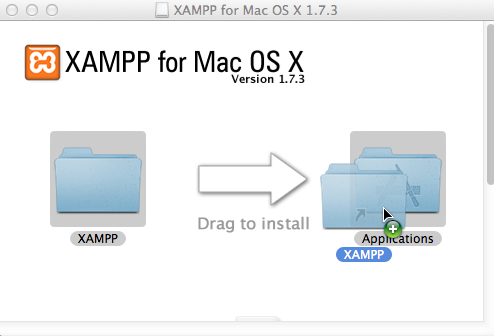
Double-click the file you just downloaded so that your computer can uncompress it. Then install XAMPP as you would any application. On a Mac, that means dragging the XAMPP file into your applications folder.
Open XAMPP and make sure everything’s running properly

Open up the XAMPP folder you just installed. Find the application called XAMPP Control and double-click. A small control panel should appear. Click all three Start buttons. If everything’s working properly, green lights should appear next to Apache, MySQL, and FTP.
Open up a browser and check out XAMPP there
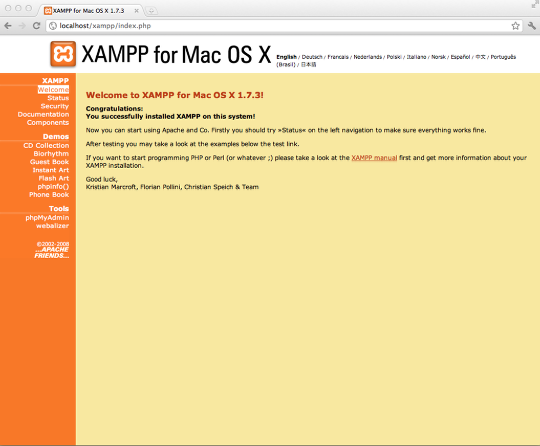
Open up a browser and enter the word localhost into the address bar. You should see the XAMPP splash page. Click on the word English. You should see a page like the one above.
Click on phpMyAdmin

Now for the tricky part! You’re going to create something called a MySQL database. It sounds scary, but it just means that you’re creating a place for WordPress to store all the data you enter into it. To start, click on phpMyAdmin (below Tools in the lefthand sidebar). PHPMyAdmin is the name of the tool that you’ll use to create your MySQL database.
Yikes! What’s this?

This is your phpMyAdmin panel, where you control your MySQL databases. Start by entering the word wordpress (use lowercase letters) in the box labeled Create New Database. Then press Create. The next page you see should say Database wordpress has been created. And that’s it!
Download WordPress

In a new browser window, head over to http://wordpress.org/ and click on Download WordPress. When the file downloads, unzip it.
Move your WordPress folder
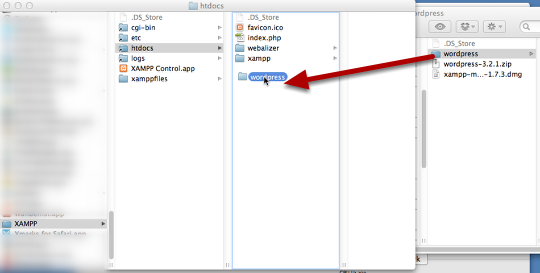
Your wordpress folder should be on your desktop or your Downloads folder (wherever you downloaded it). Your XAMPP folder should be in your Applications folder (where you put it earlier).
You want to move the wordpress folder into a folder called htdocs. The htdocs folder is located right inside the XAMPP folder. Just drag the wordpress folder into the htdocs folder.
Open the file called wp-config-sample
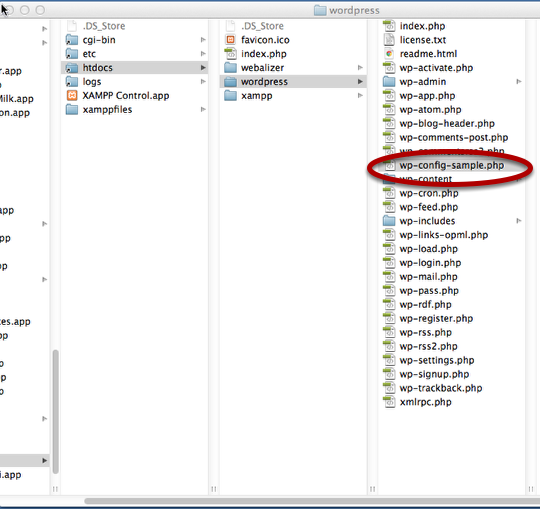
This file is right inside your wordpress folder. Open it using a text editor by right-clicking (control-clicking if you’re using a Mac) and selecting Open With and then TextEdit or Notepad.
Edit the wp-config-sample.php file

Replace the words inside the quotation marks with the following information:
- Database: wordpress
- MySQL database username: root
- MySQL database password: Erase the word that appears between the quotation marks and leave this blank
- MySQL hostname: localhost
That’s it! You can leave the rest alone. Save the file and then close it.
Change the name of the wp-config-sample.php file

Change the name of the wp-config-sample.php file to wp-config.php.
Open up your WordPress site!
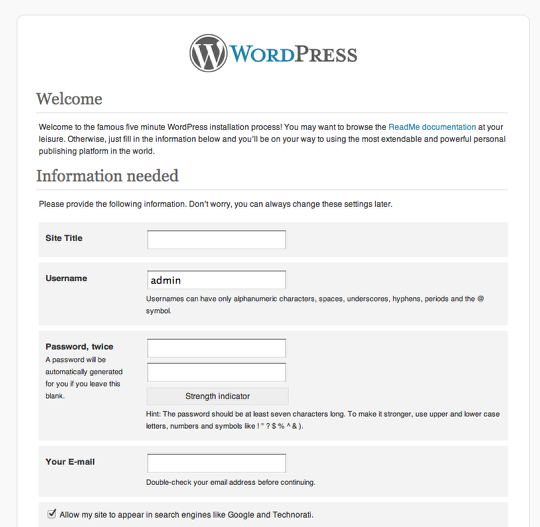
Back at your browser, type in localhost/wordpress in the address bar. You should see the page above. Just enter the required information and you’re ready to go!
In the future, whenever you want to start up your WordPress site, just double-click on the XAMPP icon, click each Start button, open a browser window, and type localhost/wordpress .
8 responses to “Install WordPress on your Mac”
Thank you so much for this exceptionally user-friendly post! I’m in the process of doing this now, and am glad to have found this before I finished the install. One question for you, though. Can I ask why you went with XAMPP over MAMP? You’re the first I’ve seen to recommend the former. All the advice I had been getting to date was to go with MAMP. Thanks again!
Hi Chris! I’m glad the post was useful. I’ve used both MAMP and XAMPP and don’t have much of a preference either way. However, I’ve heard reports of people running into problems when trying to use MAMP with Lion, and in fact ran into some problems myself when trying to install Omeka. Plus, since I was sending these instructions out to people who might be on either a Mac or a PC, I wanted to recommend an application that could work on either. So I say stick with whichever you’re more comfortable with!
Thx God i found your site, its so dificult to learn wordpres for mac in my country, indonesia.
Thank you so much miriam
Rgrds
Tommy
You rock…This was so helpful. I was gearing up for a full day of frustration, but I found your site and this whole thing probably took me fifteen minutes. Thank you so much.
Thank you so much, this was super helpful.
Hi,
Your written instructions mirrored those of a video – http://www.tubetorial.com/how-to-install-wordpress-on-your-mac-with-xampp/ – I watched today; other than the filename it was identical.
I couldn’t get my install to work either time. It gives me an “error establishing a database connection”. Any thoughts as to what might be causing this?
Full disclosure: I am WP novice and know exactly ZERO about coding. It was recommended that I take my site off line while I work on it, hence the reasoning behind the xampp attempt.
Nevermind! I figured out my problem and fixed it…MYSELF! HA!
Sorry, been alot of “how do I’s” and it makes you feel ummm, well, I am sure there is a better word than impotent, but right now it escapes me.
I like the efforts you have put in this, thank you for all the great blog posts.